How To: Collect Signatures with Attached Agreements During Checkout
Assetbots Team
A new feature is available in Assetbots called Agreements. Agreements allow you to customize and automate signature request emails sent to your borrowers during checkout.
There are two customizations you can make to the default signature request email:
- Write your own instructions or other text. If you choose not to customize the text, our default instructions will be used (Your signature is requested to indicate that you have received the items below.).
- Attach files such as borrower agreements or acceptable use policies.
By combining these two features, you can create a seamless checkout experience for your staff and borrowers.
Agreements in Assetbots go a step further and allow you to automate which people or assets receive which attacments. For example, you can send an Acceptable Use Policy to employees checking out IT equipment, and a Borrower Agreement to students checking out lab equipment. Assetbots will select the correct agreement automatically based on the details of your checkout, so you don’t have to train your staff on which one to choose for each situation!
Here is how to get started:
1. Start a New Checkout
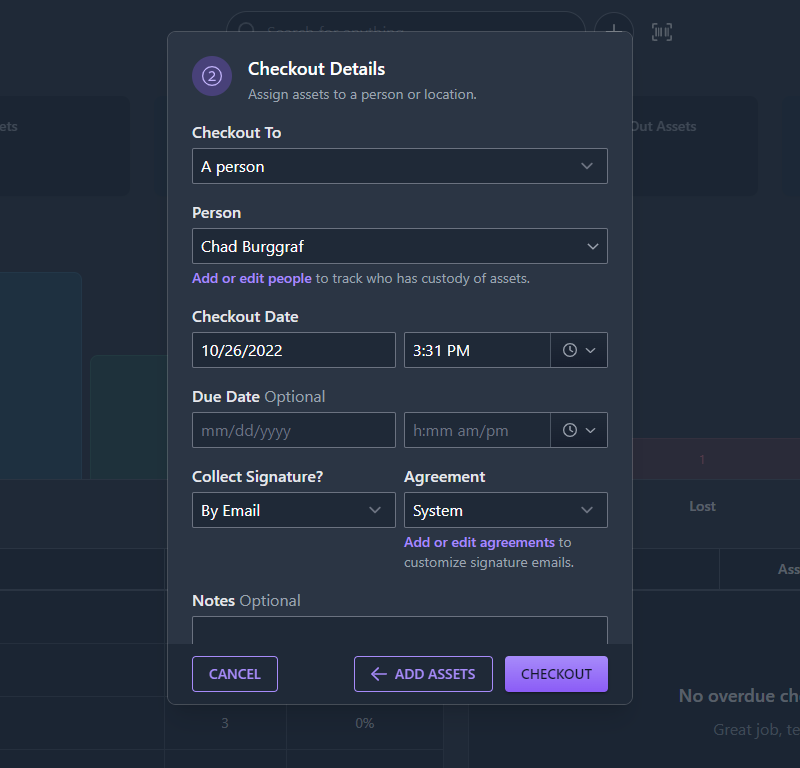
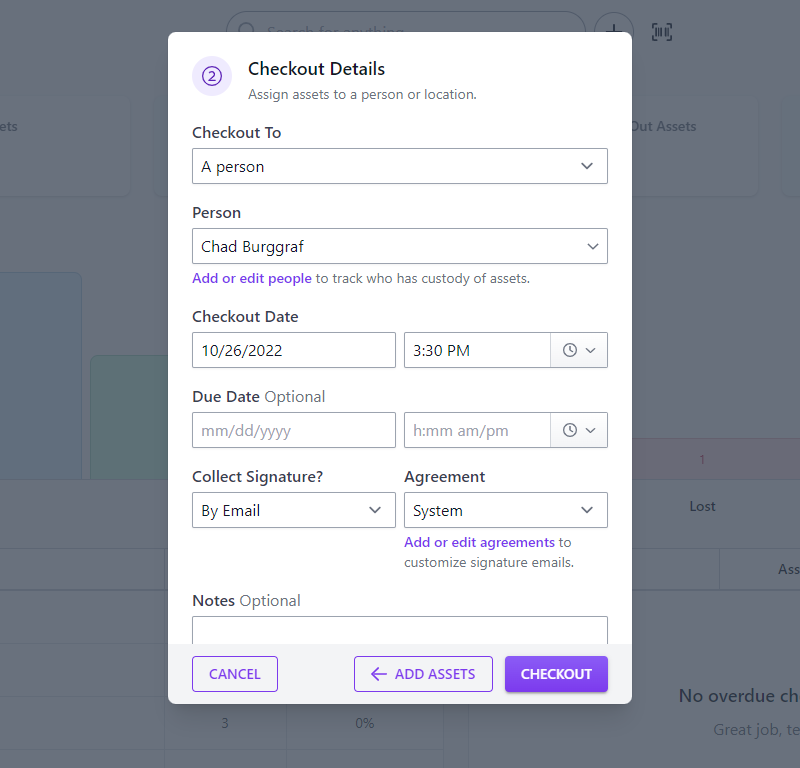
Agreements are customized as part of the Checkout Assets flow. In Step 2: Checkout Details, change the value of Collect Signature? to By Email. A new field called Agreement will appear with a default value of System. Customize your agreements by clicking the Add or edit agreements link.
2. Add an Agreement
In the Agreements dialog, click Add Agreement to create a new agreement. Give your agreement a name, optionally add custom instructions, and attach any files you would like to include. Click Save Agreement and your new agreement will be selected for this checkout.
3. Automate Agreement Selection
If you want to create multiple agreements, or only want to use your customized agreement for certain people or assets, you can automate when your agreement is selected based on your checkout details.
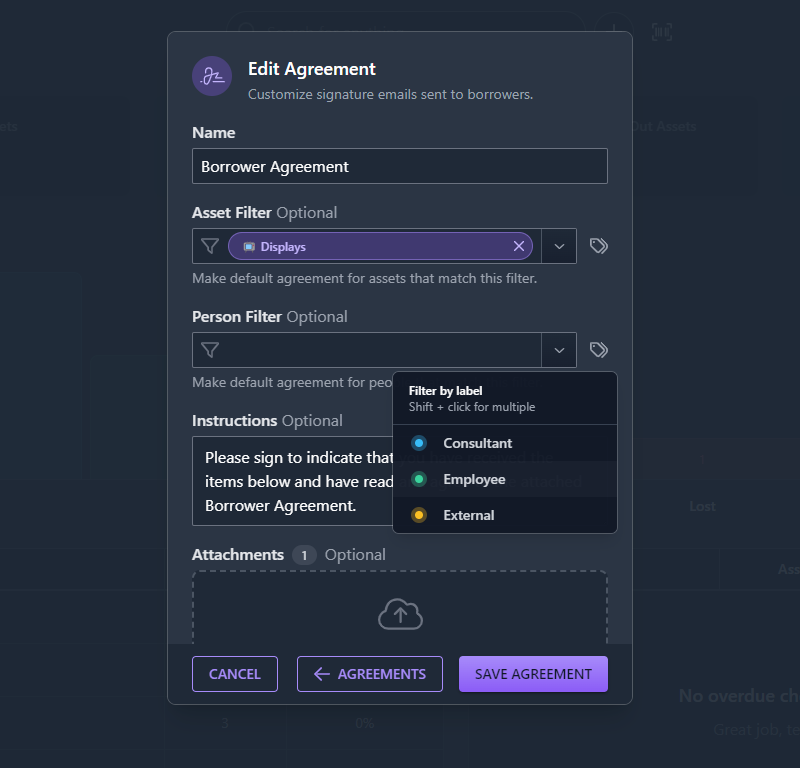
Navigate back into the Agreements dialog and click the edit button for the agreement you wish to automate. Enter or select a search filter in the Asset Filter or Person Filter fields to make this agreement the default for assets and/or people that match that filter.
For example, if you use labels in your People directory such as Employee, Student, External, etc., you can select a label in the labels dropdown to apply this agreement to. Or, if you have asset categories like Laptops, Displays, Workstations, etc., you can select a saved filter for the category to apply this agreement to.
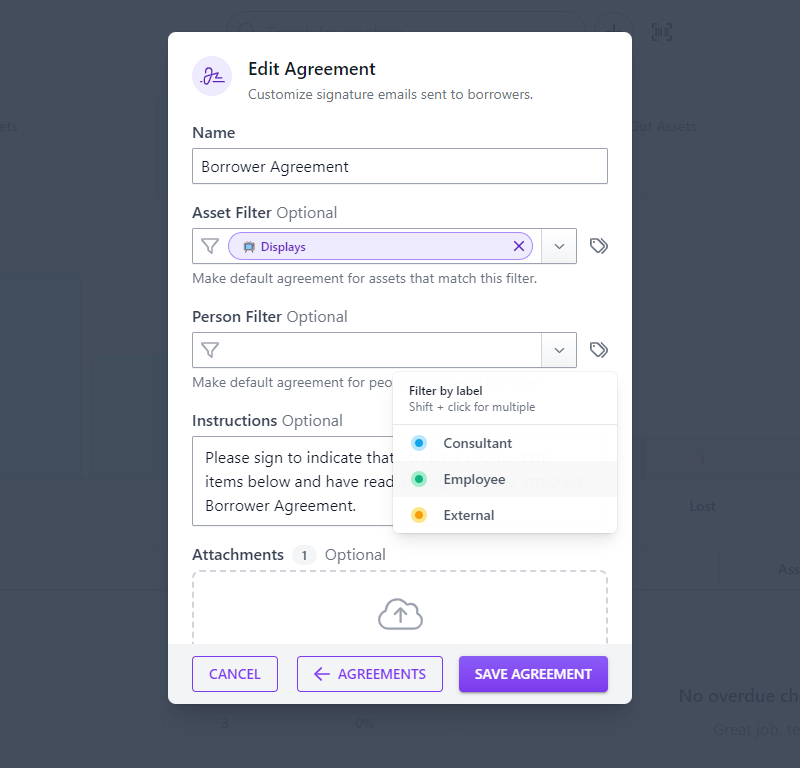
You are not limited to saved filters or labels here; feel free to enter a custom search as well. You may want to review some of our search pro-tips to see what is possible.
4. Manual Override
We’ve thought hard about how to make selecting the right agreement automatically work for most scenarios, but there may be situations where you want to choose manually. Simply choose one from the dropdown – once a choice has been selected, Assetbots will not automatically change it.
That’s It!
Are you attaching agreements when collecting borrower signatures? We would love to hear about your experience! Open a ticket within your Assetbots account if you have any issues or need help setting up your agreements.
Happy tracking!
