How To: Sync Devices and Users with Assetbots Kandji Integration
Engineering Team
Kandji is a powerful, modern Mobile Device Management (MDM) platform for Apple devices. Now you can automate your entire Apple asset management process by connecting your Kandji tenant to your Assetbots database!
By integrating Kandji and Assetbots, you can:
- Import devices from Kandji into Assetbots
- Import device users from Kandji into Assetbots
- Import device assignment from Kandji into Assetbots as checkouts
- Sync check-ins and checkouts from Assetbots to Kandji as device assignments
- Sync asset tag IDs from Assetbots to Kandji
- Perform quick actions right from Assetbots on Kandji devices such as locking, shutting down, or restarting
In this guide, we’ll walk you through setting up this integration step-by-step. If you get stuck at any point, please open a ticket within your Assetbots account and our team will be happy to help.
- Map Kandji properties to Assetbots fields
- Choose or create a default category
- Create a Kandji API token
- Enable the integration
- Explore quick actions
- Setup is complete!
1. Map Kandji properties to Assetbots fields
Navigate to the Settings tab in Assetbots, click Integrations and choose Kandji from the list. Assetbots will perform an auto-mapping of Kandji properties to your Assetbots fields the first time you visit the integration, but you should review and customize to suit your needs.
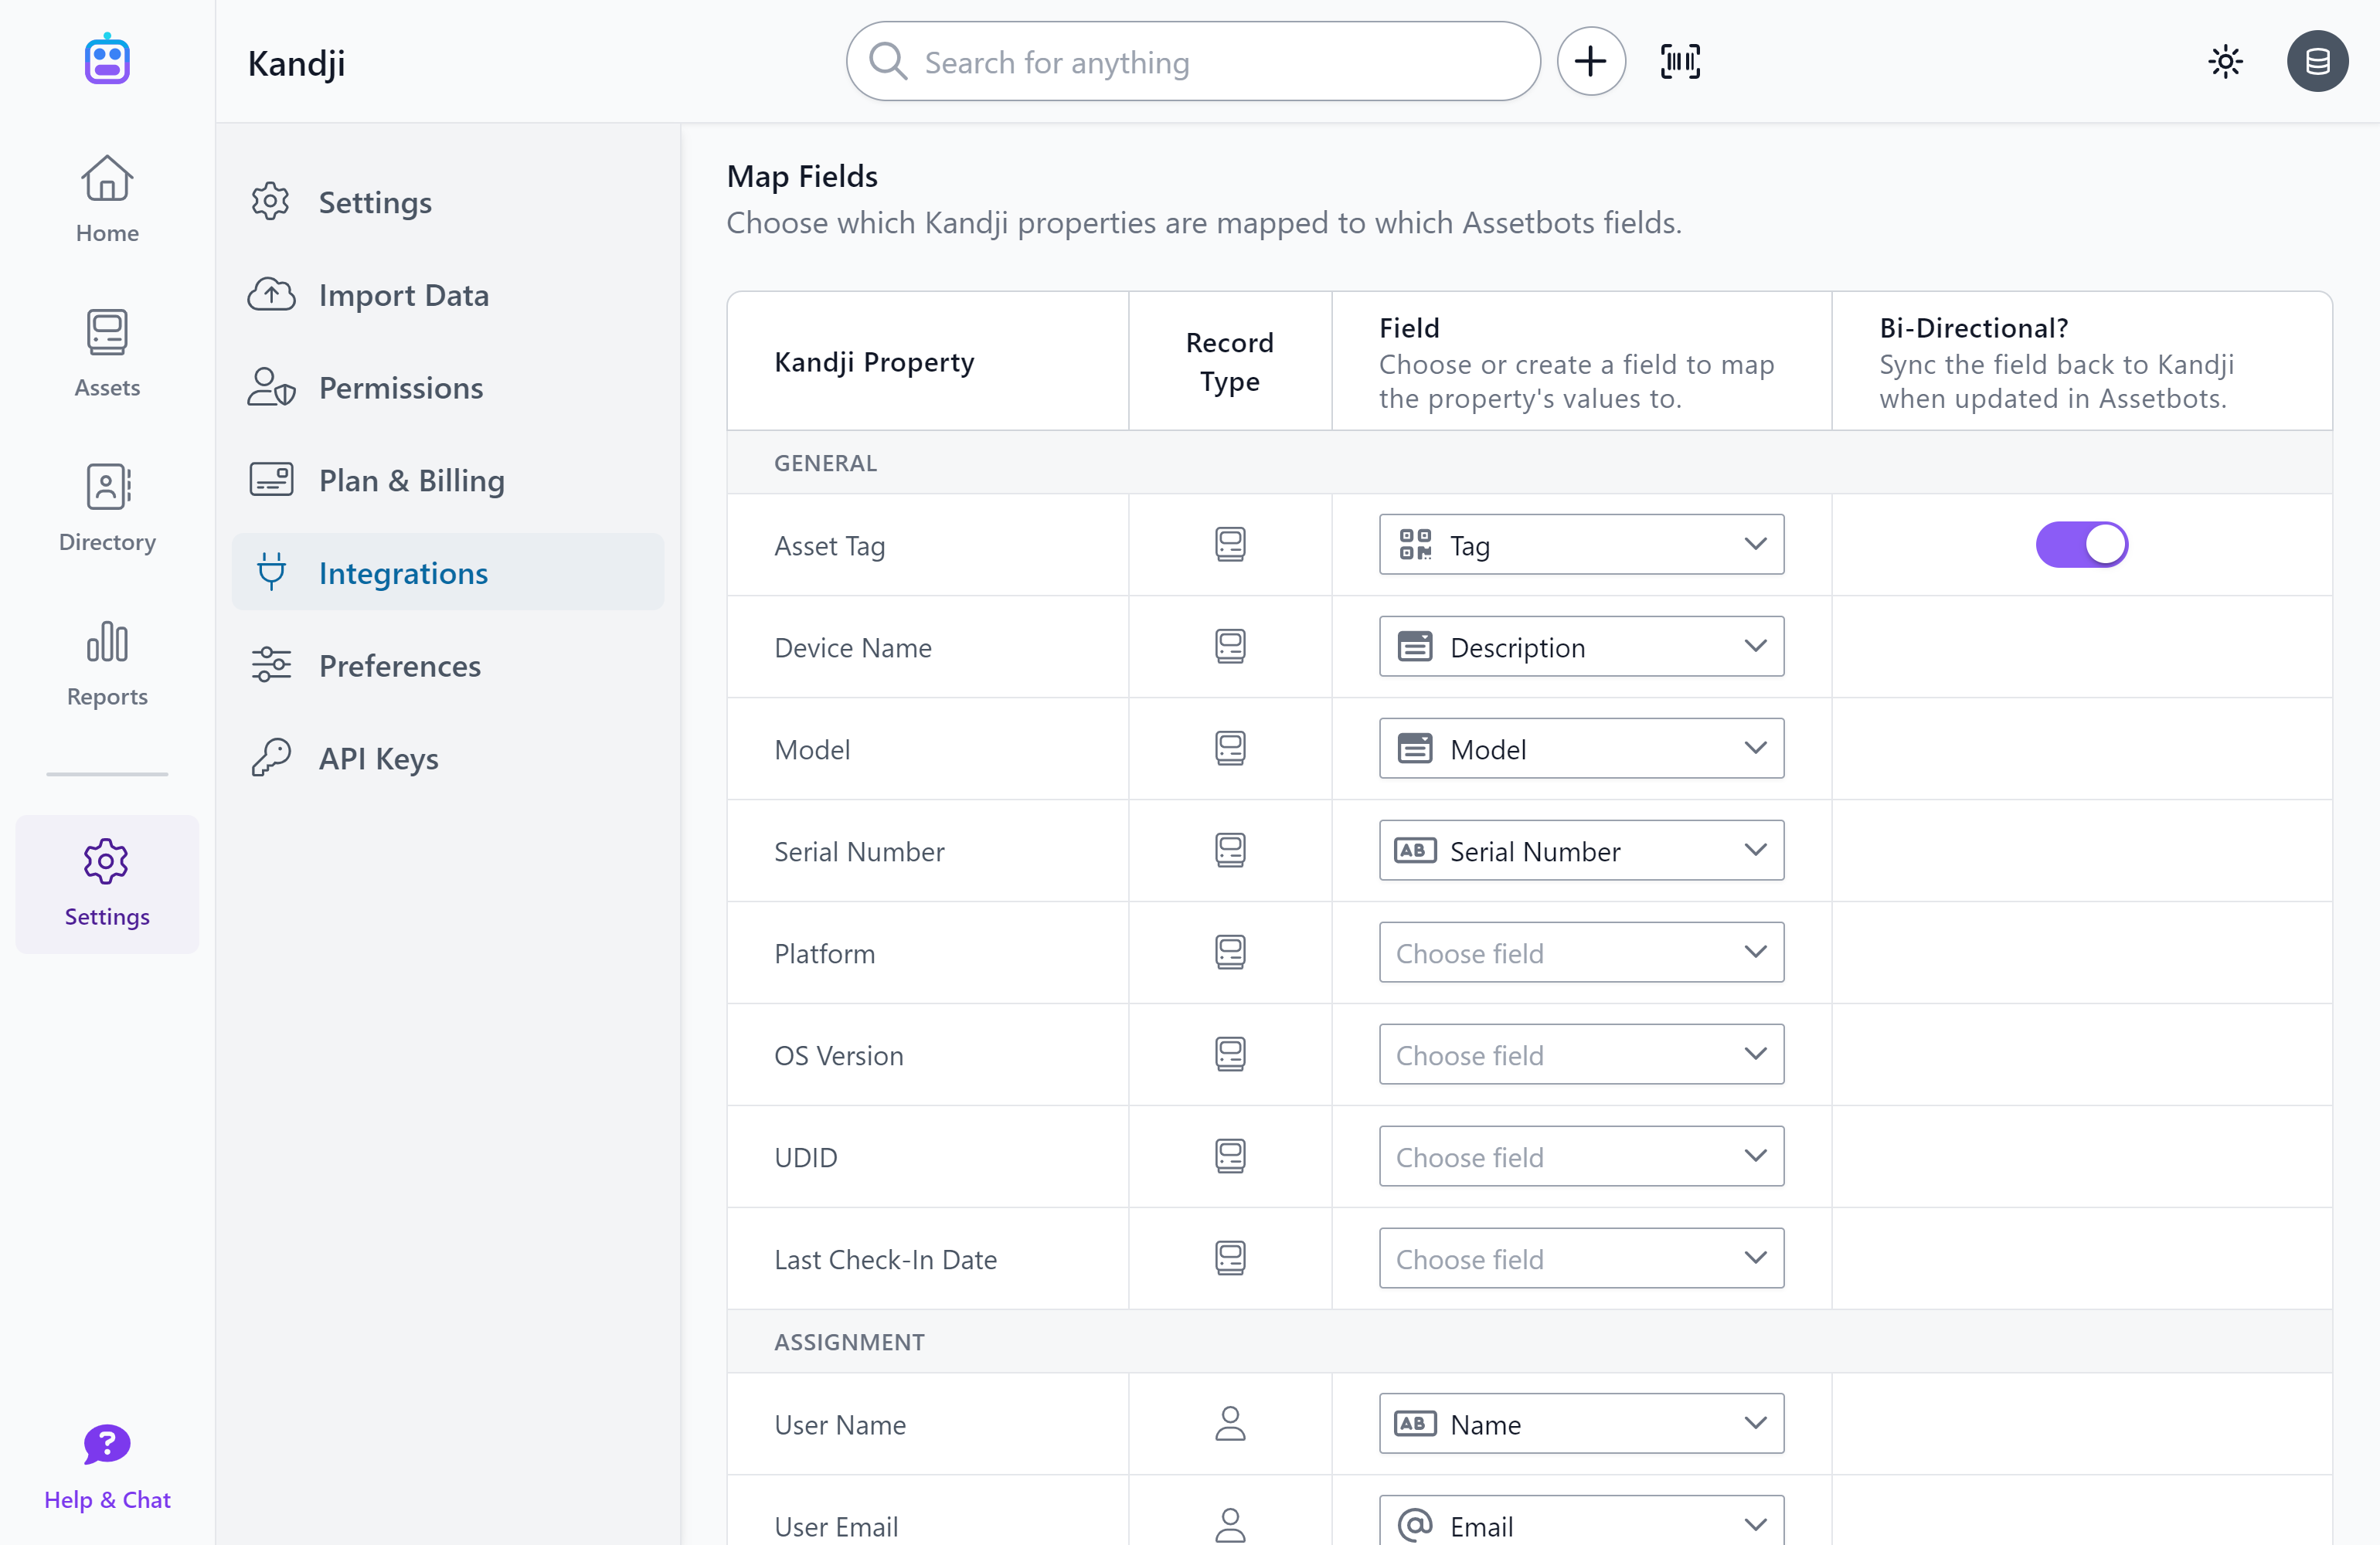
There are many Kandji properties available for import. Select Skip field from the dropdown to un-map a field, and feel free to create new fields as needed. You may also decide to enable two-way sync of the Asset Tag property so that your Assetbots Tag values are sent to Kandji.
2. Choose or create a default category
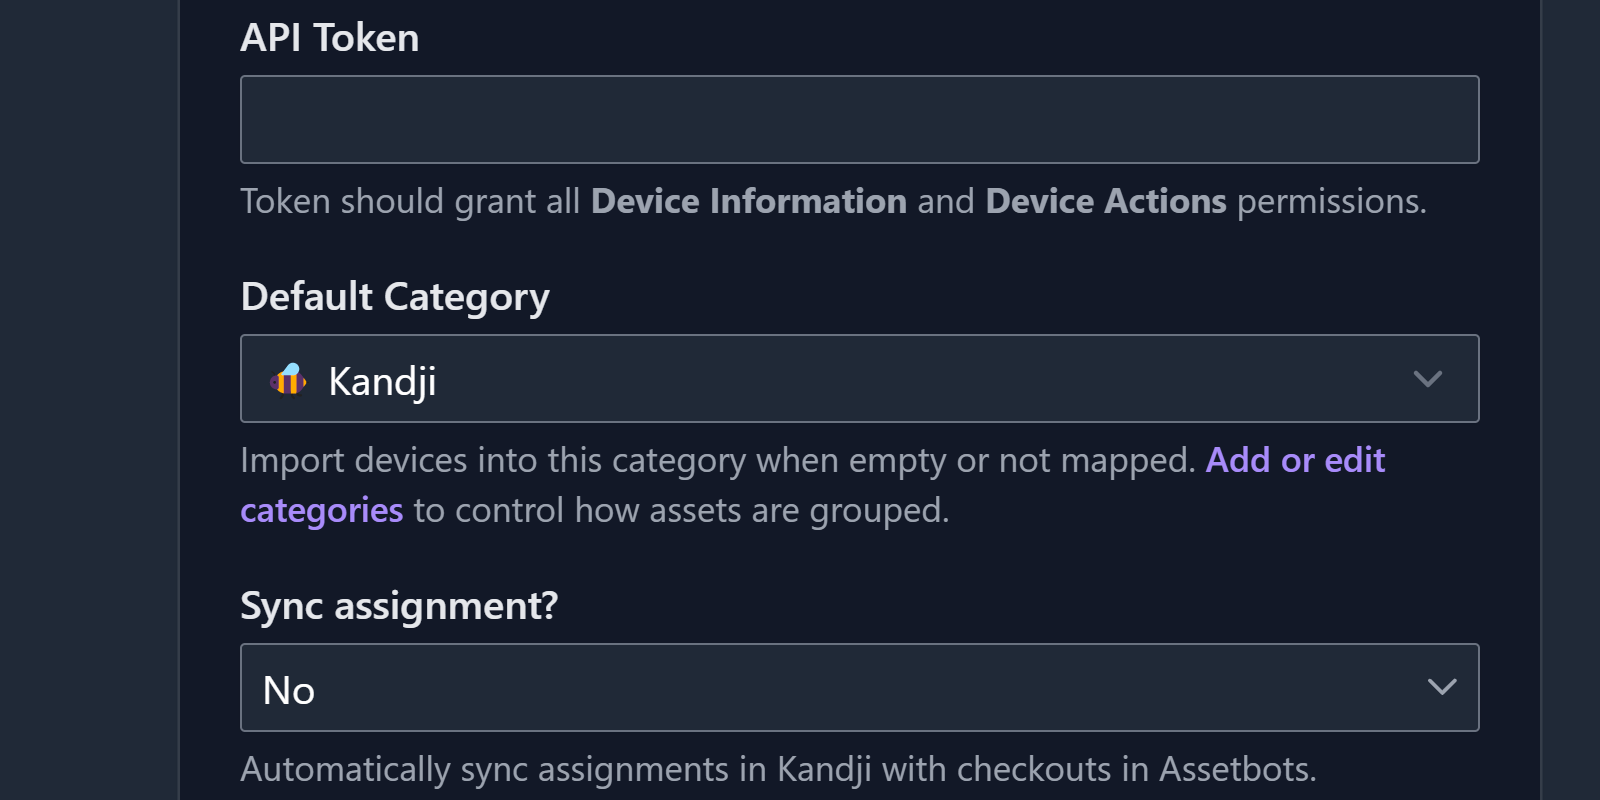
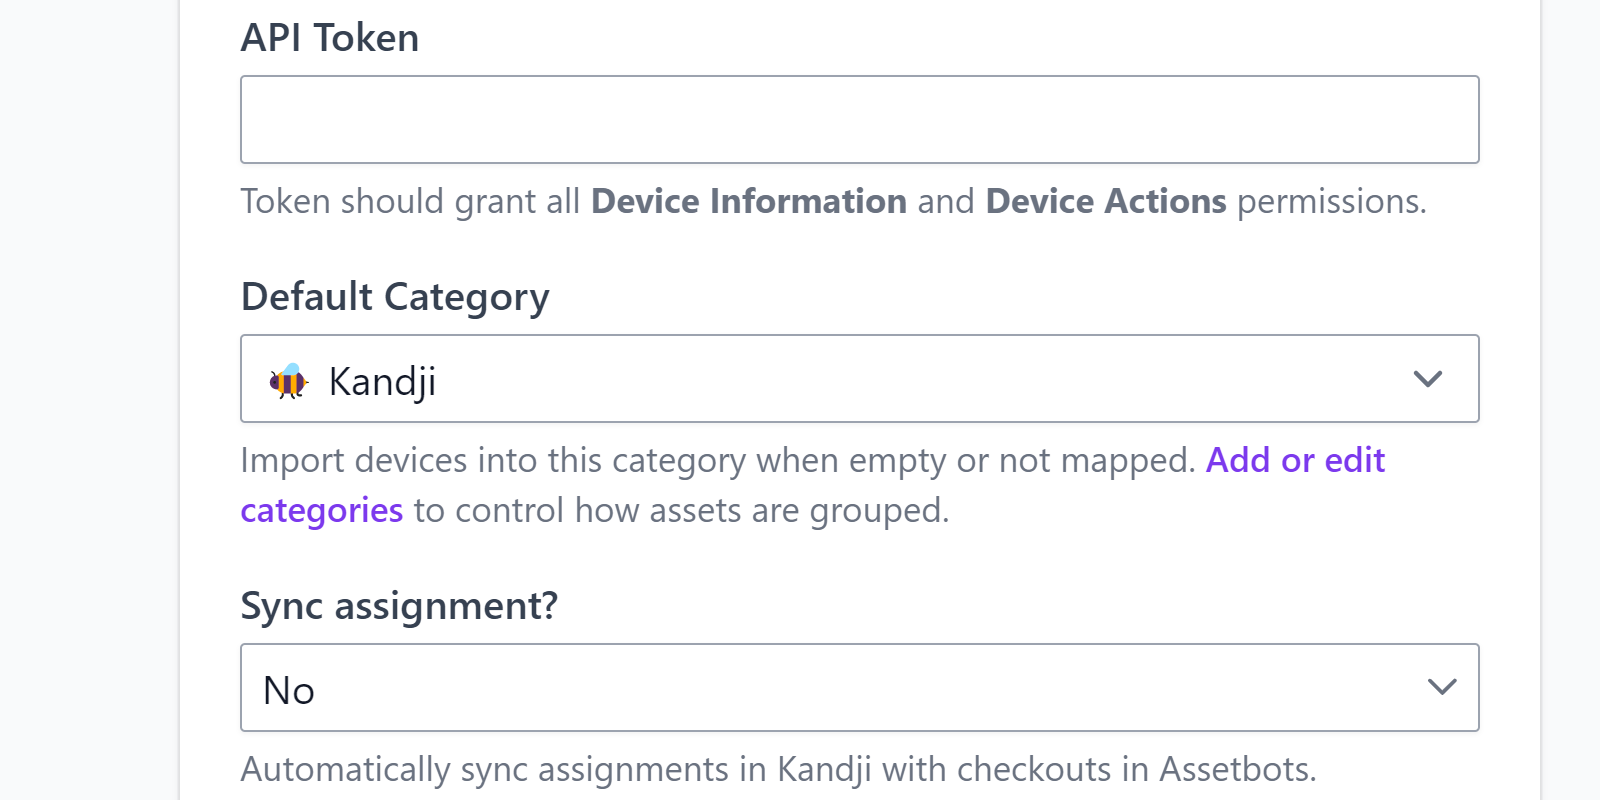
Assetbots needs to know what category to place imported devices into if you choose not to map a Kandji property to your Category field. You can freely edit the category of imported devices, so this can either be their permanent category or a temporary one.
3. Create a Kandji API token
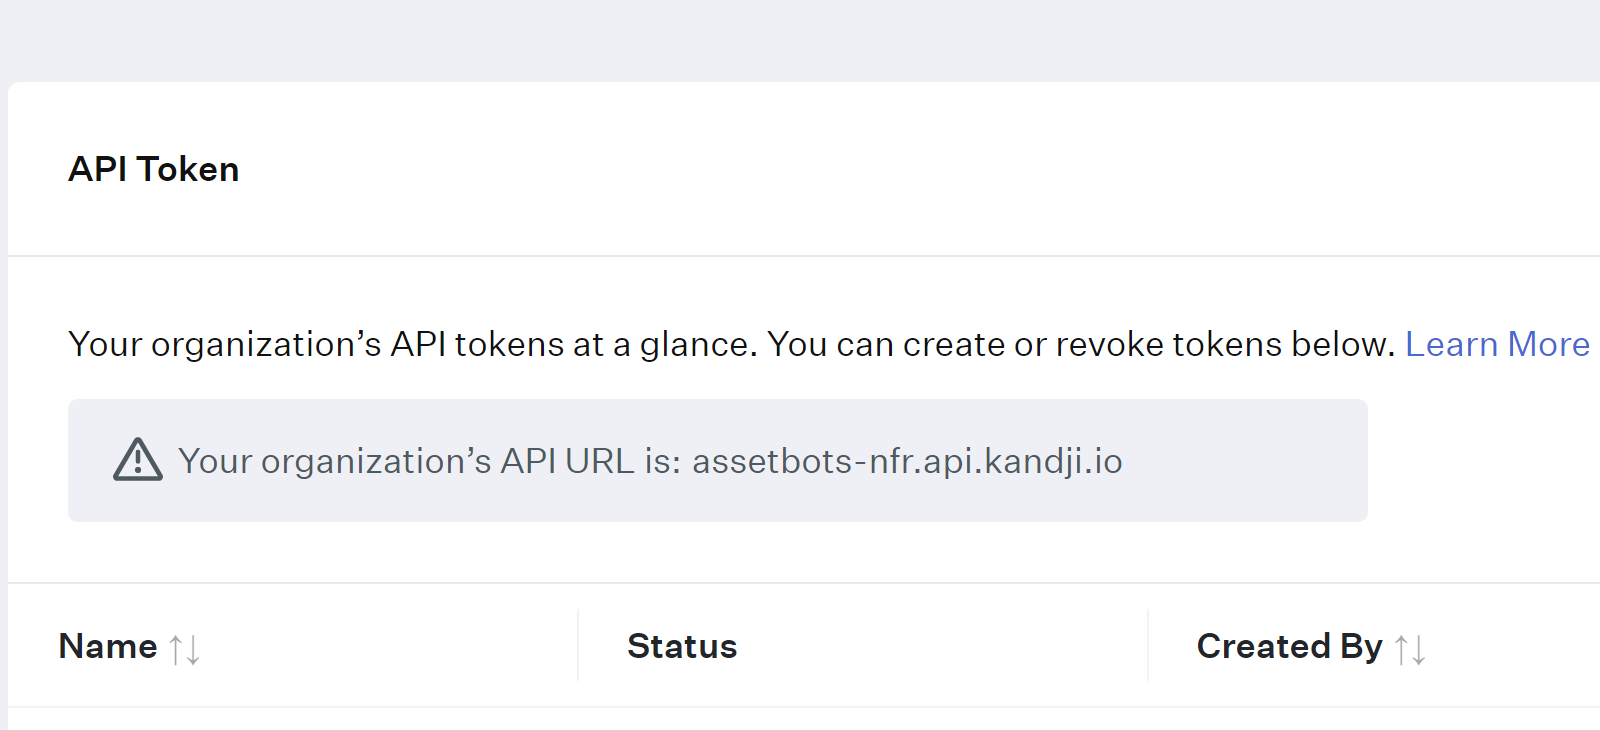
Log in to your Kandji account and navigate to Settings in the left bar, then choose the Access tab. Scroll down to the API Token section and click Add Token.
Name your new token – we recommend Assetbots or similar – and click Create. Copy your token value and paste it into the API Token field of your Assetbots Kandji integration (but do not click Enable quite yet).
Once copied, click Next, then click Configure. You need to grant this token permissions that Assetbots can use to talk to Kandji. Here are your options:
Read-Only Permissions
The minimum permissions required for Assetbots to read data from Kandji are:
- Devices: Device details
- Devices: Device list
- Devices: Device ID
2-Way Sync Permissions
If you want to sync data back to Kandji from Assetbots, you also need:
- Devices: Update a device
Actions Permissions
If you want to perform quick actions on Kandji devices from Assetbots, select these as well:
- Device Actions: Send a blank push
- Device Actions: Lock device
- Device Actions: Restart device
- Device Actions: Shutdown device
Once you have selected all the permissions you require click Save and then click Close. Find your API URL back on the Access tab in the API Token section and copy it to your clipboard. Finally, switch over to your Kandji integration page in Assetbots and paste it into the API URL field there.
4. Enable the integration
Head over to the Kandji integration page in Assetbots. You should now have the following configured:
- API URL
- API Token
- Default Category
- Field Mappings
You can optionally configure two additional settings before enabling the integration:
- Sync assignment?
Choose whether to sync Kandji device assignment with Assetbots checkouts. If you added 2-way sync permissions to your API token you can choose Yes, in both directions to have checkouts automatically assign devices in Kandji. Otherwise, choose either Yes, from Kandji to Assetbots to import assignments or No to skip assignment sync. - Enable device actions?
If you added actions permissions to your API token you can choose Yes. This will allow you to perform quick actions on your Kandji devices directly from Assetbots.
Click Enable to enable the integration. Your first sync will start shortly, and you should see data start to appear within a minute or two.
5. Explore quick actions
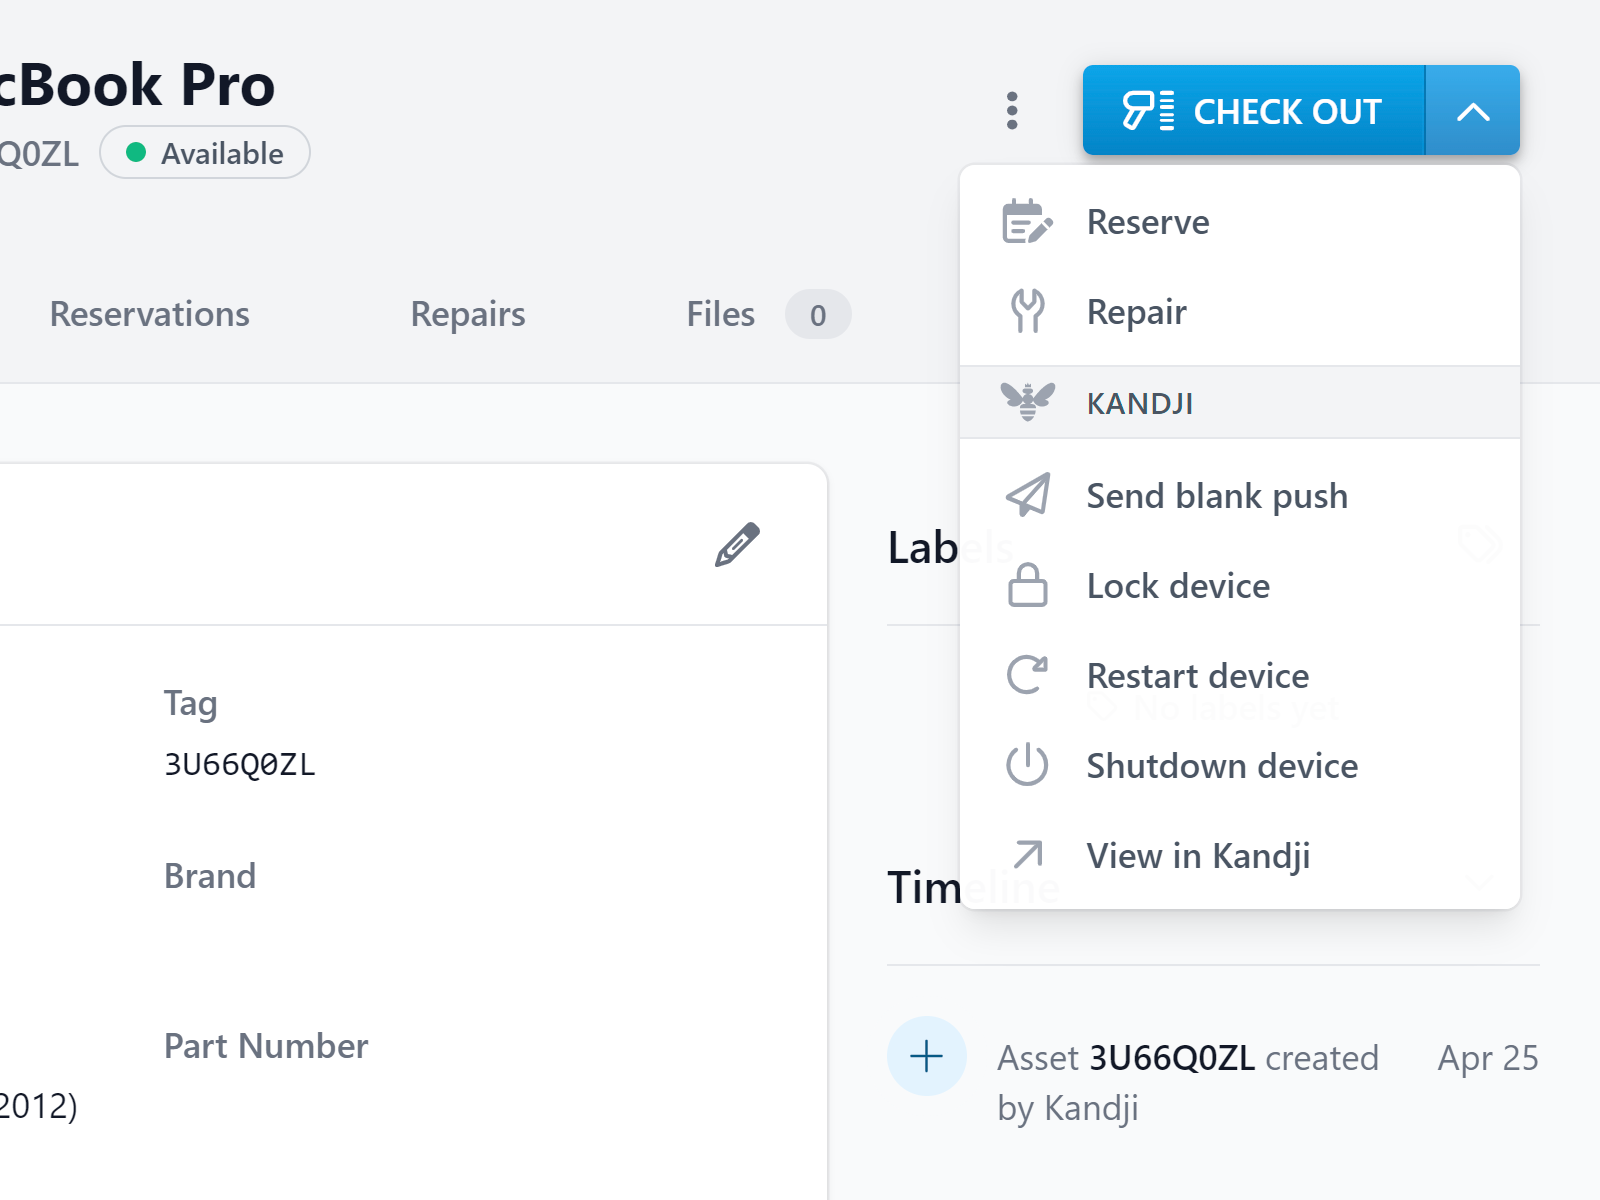
If you enabled device actions you will see a new set of options available on your assets imported from Kandji.
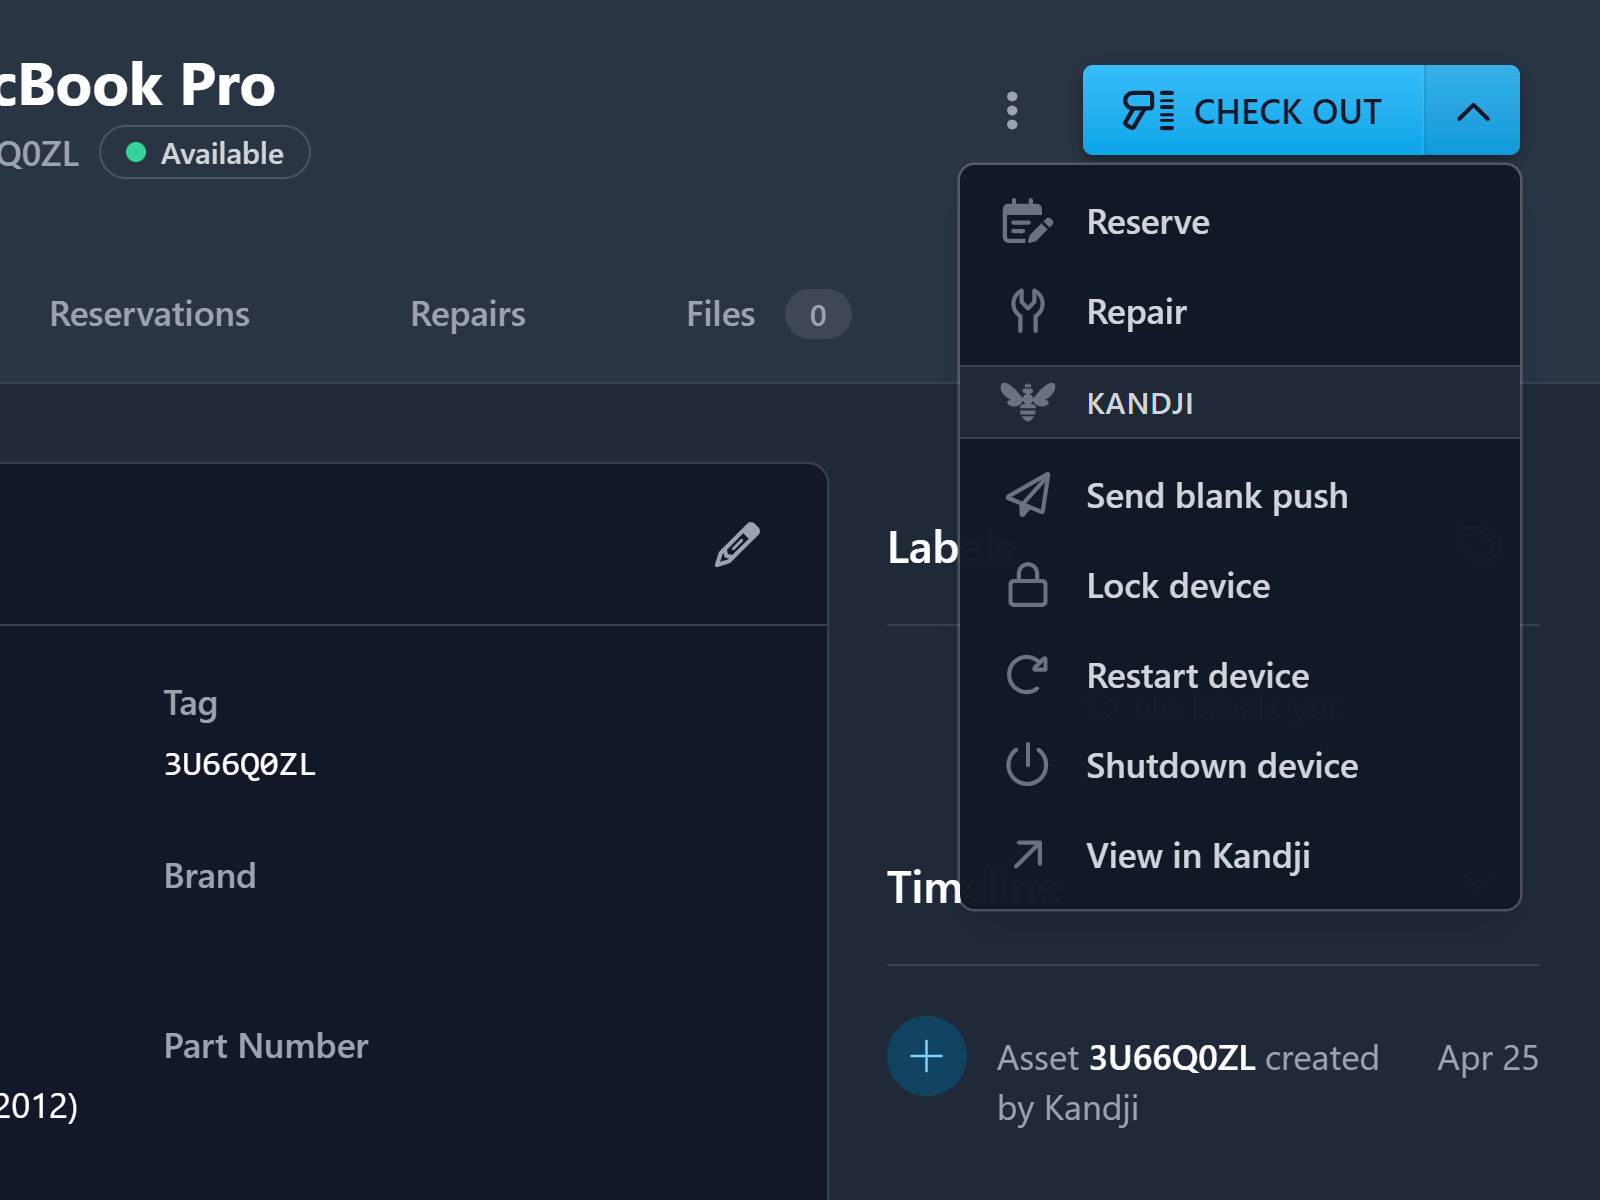
Visit an asset detail view and click the More options dropdown to the right of the primary action button (typically Check Out or Check In). Assets linked to your Kandji tenant will include a special Kandji menu of options:
- Send blank push
Sends a blank push command to the device. - Lock device
Locks the device. iOS devices will need the user’s passcode to unlock, while macOS devices will need the provided PIN to unlock. - Restart device – macOS only
Immediately restarts the device as if it is powered on and connected to Kandji. - Shutdown device – macOS only
Immediately shuts down the device if it is powered on and connected to Kandji. - View in Kandji
Switch over to the device details page in Kandji for more information or to take other actions.
6. Setup is complete!
You’re all set! Assetbots will import changes from Kandji periodically. If enabled, changes made in Assetbots will be synced to Kandji as quickly as possible.
Important notes:
- Kandji does not support creating users, so checkouts will not be synced to Kandji assignments unless the Assetbots Person record was previously imported from Kandji. This is a known limitation that the team at Kandji are working on improving.
- Existing Person records in Assetbots will be merged with their corresponding Kandji users. Assetbots first tries to find a matching record using the mapped Email field; if none is found it tries again using the mapped Name field. If a match is not found a new Person is created.
Our team is excited to share this integration with our customers and hope it makes tracking your Kandji assets even easier. Please open a ticket within your Assetbots account if you have questions or need help getting set up.
Happy tracking!

